In this post I’m going to review SvBony SV238 off-axis guider and how I upgraded it by adding an electronic focuser. SvBony kindly sent me their OAG for review, and I’ve been using it for a couple of months now. I’ll share my thoughts on the OAG itself first, then dive into the custom adapter I created to automate it.
Overview of the SvBony SV238 OAG
At first glance, the SvBony SV238 looks like many other off-axis guiders: it has a threaded connection on the telescope side and a screwed connection on the camera side. The helical focuser is nicely done, similar to other options out there.
However, a few features make the SV238 stand out:
- Prism Size: It’s a generous 8 by 14 millimeters, larger than what many competitors offer at this price. This is great for larger guide camera sensors, providing better light capture and more reliable guiding.
- Versatility: It comes with two mounting plates—one with M48 threads and another with M54 threads. Plus, you get adapter rings (M54 to M42 and M48 to M42), opening up tons of connection possibilities for your telescope, camera, or other gear.
When setting up, note that the OAG’s thickness varies: 17.5mm with M54 and 16.5mm with M48. This is crucial for achieving the standard 55mm back focus distance. In my setup, I connected it via M54 thread, followed by a custom spacer, my Wanderer Astro filter wheel, and the camera.
One issue I encountered: In my previous ToupTek OAG setup with a ToupTek guide camera, everything worked fine. But with the SvBony SV238, I couldn’t achieve proper focus with the same ToupTek camera — its shape doesn’t allow it to insert deep enough. No problems with slimmer cameras from ZWO, SvBony, QHY, newer ToupTek models (that have the same shape as ZWO), or similar brands. So, opt for those if you’re pairing with this OAG.
Quick Tips for Off-Axis Guiding Beginners
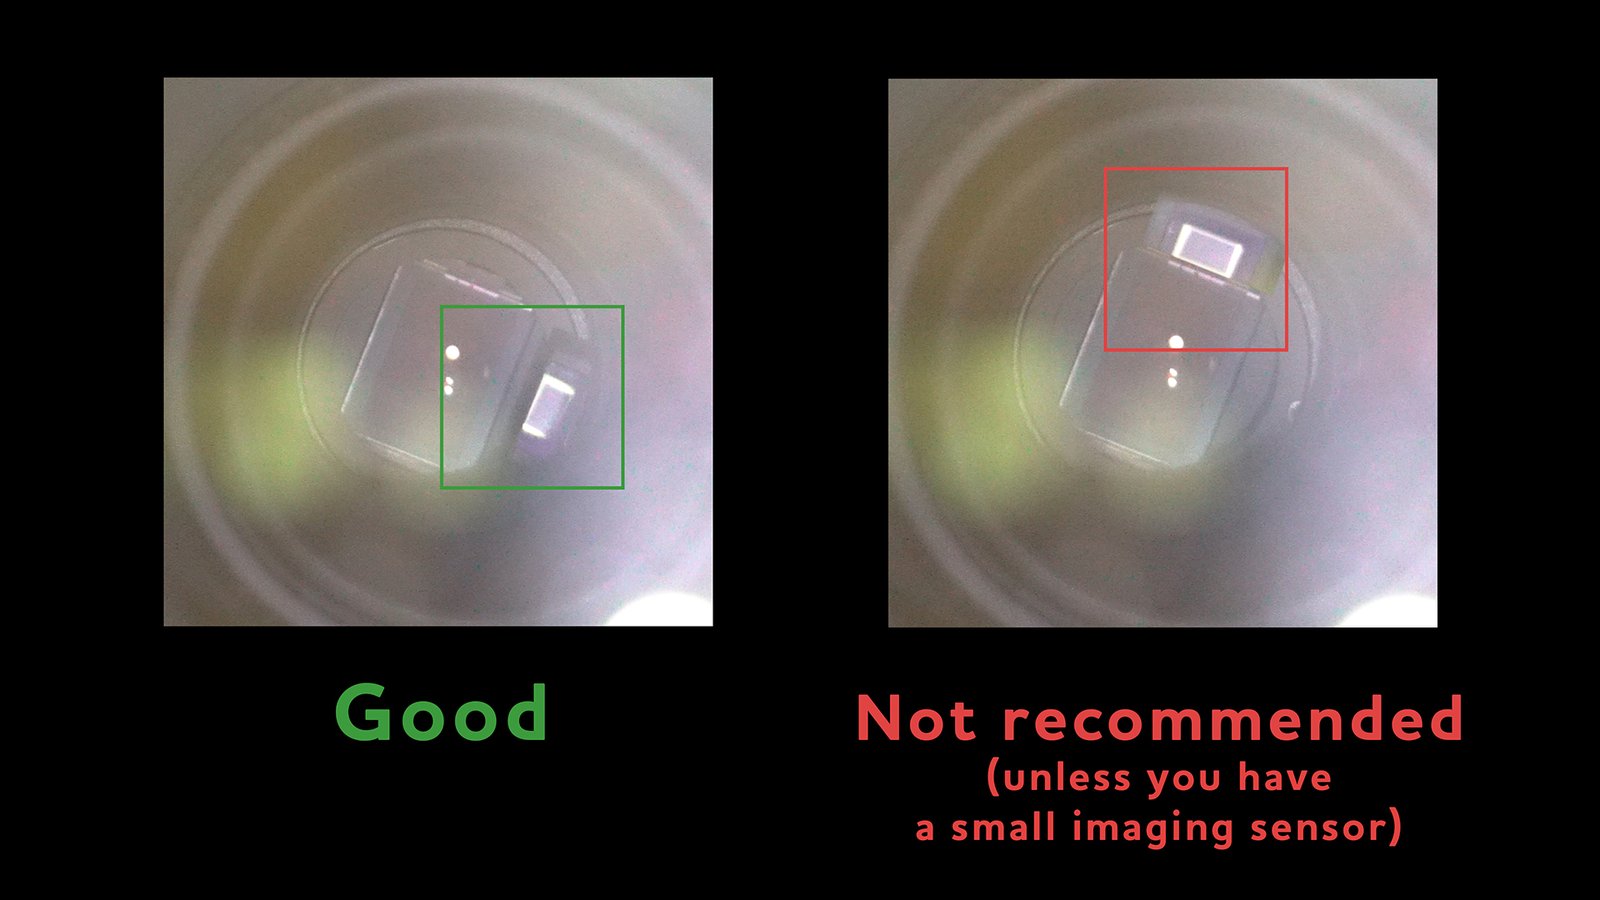
The long side of your guide camera sensor should be parallel to the long side of the prism of the OAG.
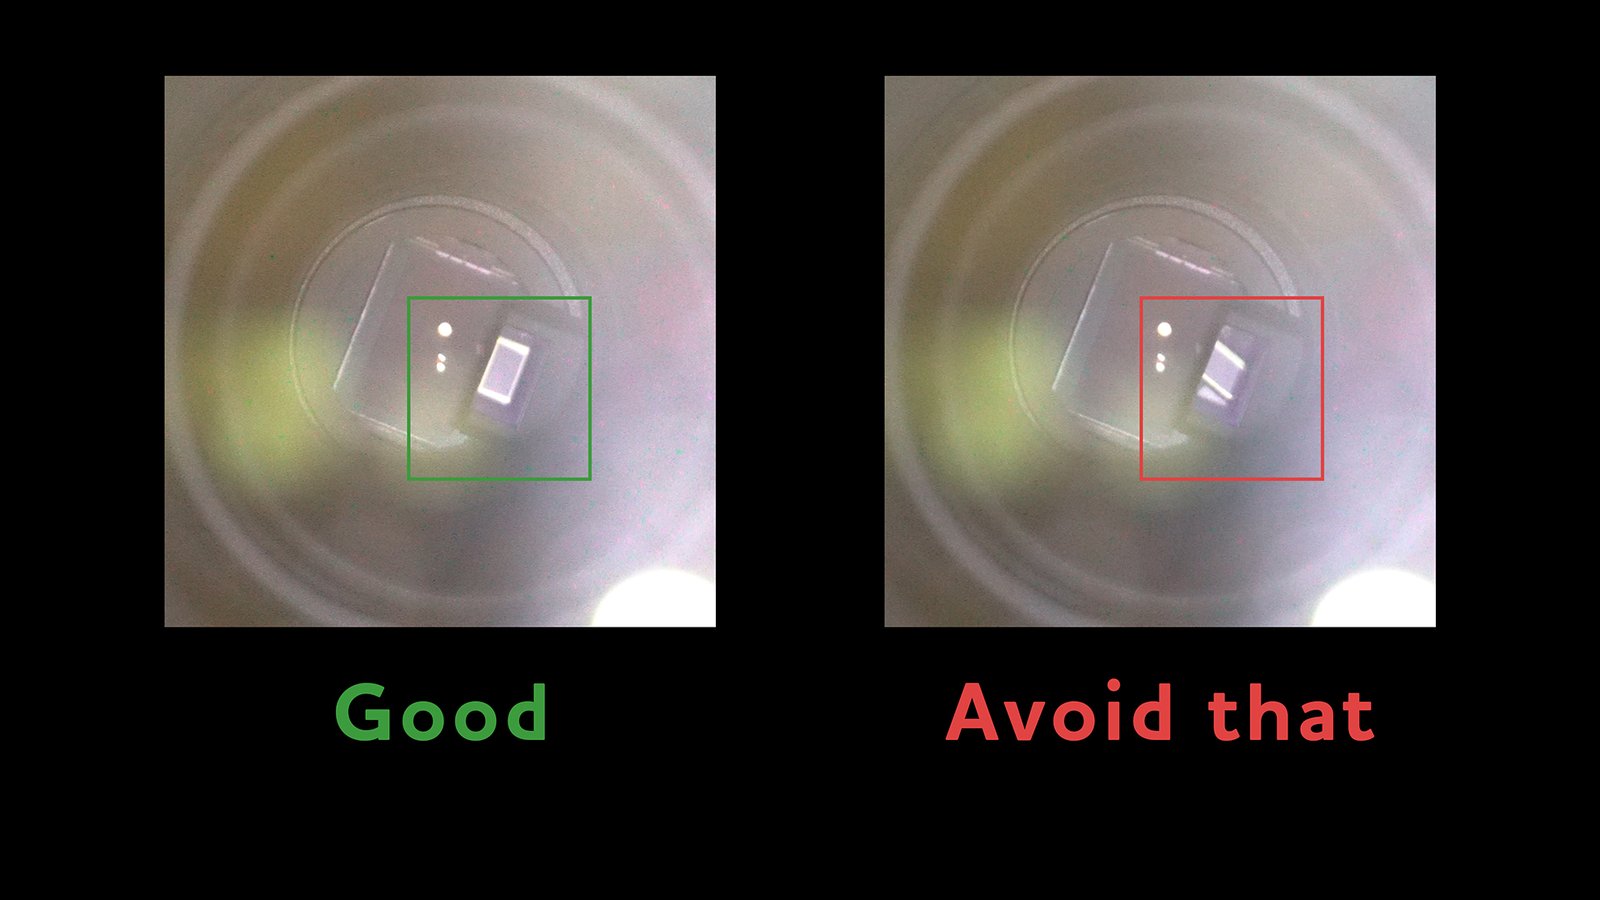
When mounting the OAG you want to make sure that the prism is not obstructing the view of your imaging camera, and the best position of the prism is towards one of the longest sides of the imaging sensor. I know it’s going to be tough for some SvBony’s cameras, but this is the best way to go.
When focusing your OAG, you need to get your main imaging camera in focus first. Then you go to PHD2 and look at the picture of your guide camera. The fastest way to find the focus is to slide the camera within the imaging path first and roughly focus stars once you start seeing them. Then you lock the position of the camera with locking screws and do some final adjustments using the helical focuser. Here is also a great video by Dylan O’Donnell where he covers this part in detail: watch now.
Automating the SV238 with My Custom Adapter
I designed a custom adapter for connecting an electronic auto focuser (EAF) to SV238. I drew inspiration from Dark Sky Geek’s video on motorizing a ZWO OAG focuser (his is more advanced, with a build-your-own EAF and drivers, while mine is just the adapter for installing an off-the-shelf one). The SvBony design conveniently allows attachment right on the helical focuser — simple and effective. Now, I can refocus my OAG remotely if needed. While you can guide on slightly out-of-focus stars, performance is always better with sharp ones. This is especially useful if your filters aren’t parfocal or come from mixed sets. Not everyone needs automation, but if your rig is remote or you want hassle-free operation, the SV238 is easy to automate.
Talking about the choice of the EAF, I went with Gemini EAF because it’s affordable and lightweight. Check out my video on the Gemini EAF here.
If this upgrade interests you, you can order the adapter (3D-printed and shipped within the U.S.) from my website. It’s available for purchase right here:

EAF Mounting Bracket for SV238 OAG
A custom-designed mounting bracket, allowing seamless integration of Gemini Electronic Auto Focuser with SvBony SV238 OAG. This bracket turns your manual helical focuser into a motorized one.
In stock (can be backordered)
Final Thoughts
The SvBony SV238 OAG is a solid choice considering its budget friendly. The main downside is compatibility with bulkier guide cameras like ToupTek’s, but it excels in value. Plus, easy automation makes it ideal for remote setups concerned about focus shifts. If you’re in the market for an affordable OAG, I think it’s a solid choice based on my two-months experience in using it. Please check out my video review of SV238 as well where I share more visual details on it.